

Fillet Weld Design
Part 2: Simplified method

Hi friends, 👋👋
As promised last week, we’ll look at fillet weld design with the simplified method today.
In textbooks, it’s said that this method is more conservative than the directional method.
→ Click here for the full article ←
So here are the steps, we need to follow (same as for the directional method):
Calculate the internal forces at the location of the weld
Define the geometry properties of the fillet weld
Define material properties
Calculate the design stresses and resistance of the weld
Check utilization
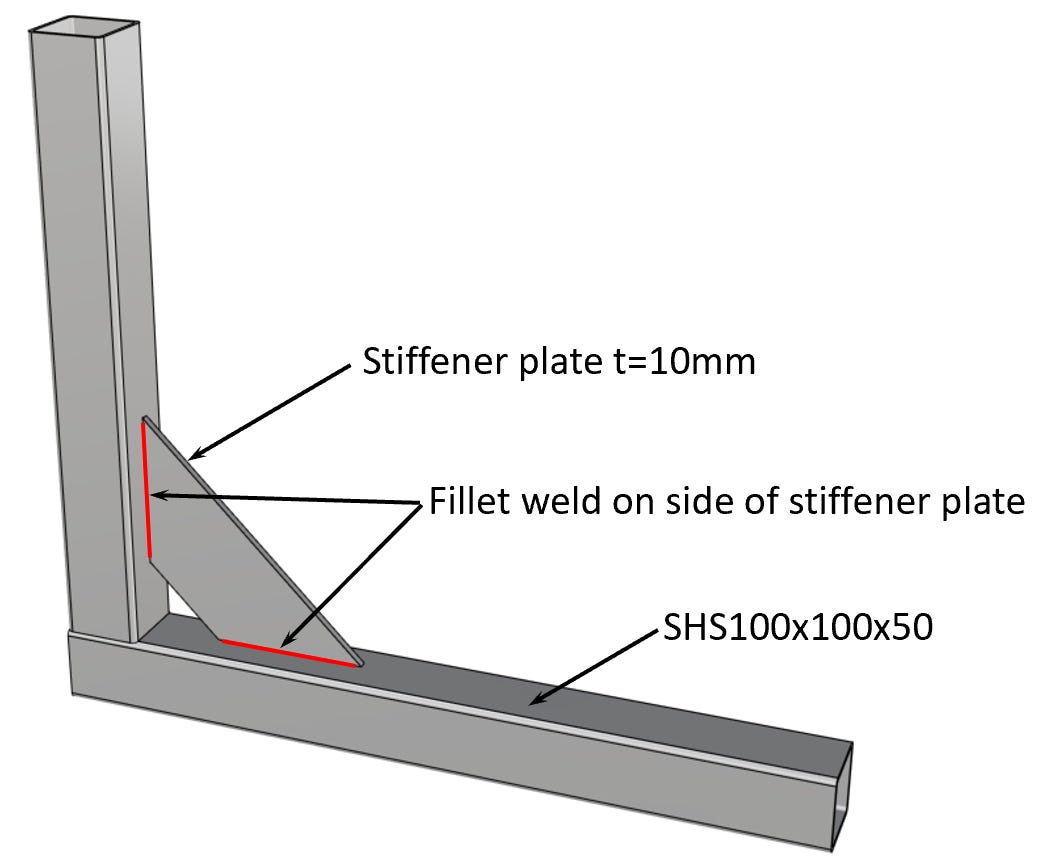
We’ll use the same example as last week: A fillet weld is used to connect a steel plate with SHS profiles. ⬇️⬇️
There is a fillet weld used on both sides of the stiffener plate.
So let’s get started. 🚀🚀
#1 Internal forces
We’ll also use the same internal forces as last week. That way we can quickly compare both methods.

#2 Define the geometry properties of the fillet weld
The fillet weld has the following dimensions:

Moment of inertia of 2 sided weld:

Section modulus of 2 sided weld:
#3 Define material properties

#4 Calculation of the design stresses and resistance of the weld
The stresses in the weld are calculated from the internal forces acting in the plate.

Normal stress:

Shear stress:

Resulting stress:

Resistance stress:

#5 Utilization

We can see that the utilization is a bit higher than for the directional method (=81%). However, we also demonstrated a very simple connection.
Using different cross-sections and different internal forces could lead to a bigger difference in utilization between the 2 methods.
Conclusion
Also, the simplified method isn’t that difficult, is it? We find the internal forces acting in the connection, define geometric and material properties, and calculate the stresses in the weld and the resistance stress. That’s it.
Hope this guide helped you understand welded connections better.
Next week, I am sharing an exciting update. 😮😮
So hope to see you there. ✌️✌️
Cheers,
Laurin.